
Customer reactions form a ladder from Cheap to Perfect, then Expensive and Overpriced. Overpriced can make the customer walk out without buying. Cheap and Perfect sales fill the shop perk meter, and filled meters let you pick shop perks that boost tips and sale value — so a deliberate discount is sometimes the strongest move of the day.
The reaction ladder, translated
Long 1.0 playthroughs repeat the same pricing rhythm: an item flagged too cheap sells instantly but leaves money on the counter (“I sold it for too cheap… ooh, very nice”, as one streamer put it while still pocketing the sale), a Perfect price sells at full value, an Expensive price still sells at a premium, and an Overpriced quote risks the customer leaving empty-handed. The official tutorial phrasing captured in playthroughs is blunt: price too high and “they will leave”.
The practical read: treat reactions as free market research. Start from a baseline price, watch the reaction, and adjust next day — playthroughs show exactly this loop (“300 was too cheap, let’s go 400”) resolving a price within a couple of customers.
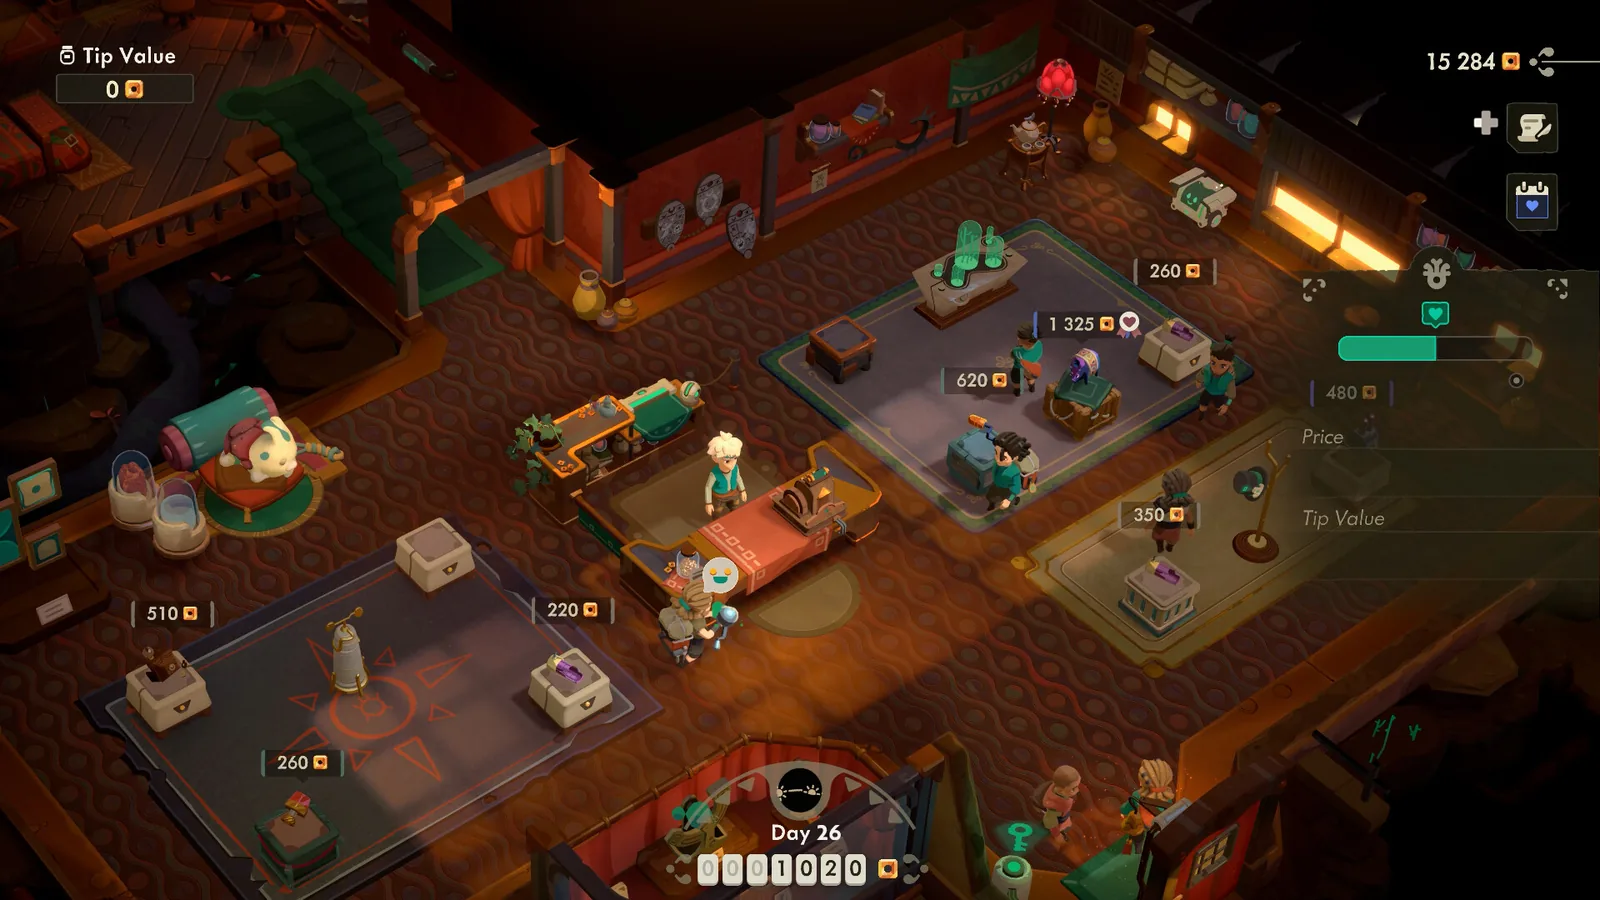
Tips are part of the price
Two official shop screenshots show a Tip Value counter running alongside day sales, and 1.0 footage confirms customers sometimes pay above the sticker as a tip. Shop perks then multiply that channel: the official perk card Hole in the Pocket (Uncommon) reads “increase your Tip by 350. Getting a Tip decreases 50 its value” — wording visible in official store material and consistent with playthrough commentary that uncommon relics placed on display “garnered me a tip”.
Named shop perks worth planning around
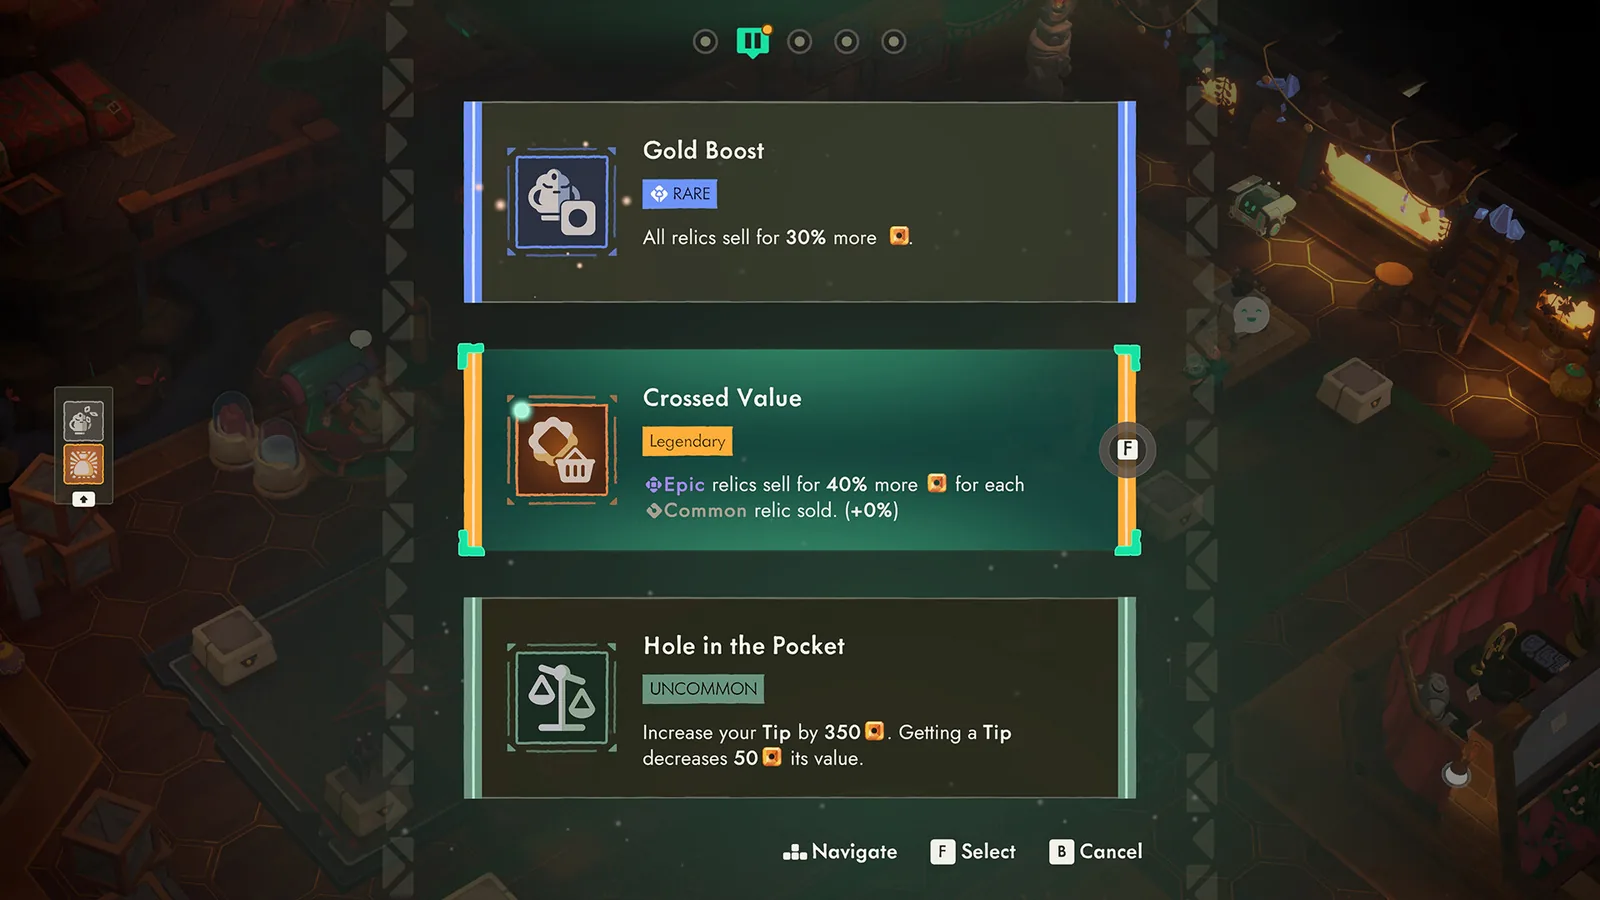
The perk selection screen shown in official store screenshots names three concrete examples:
- Gold Boost (Rare) — “All relics sell for 30% more.” A flat multiplier on everything, so take it on heavy-stock days.
- Crossed Value (Legendary) — “Epic relics sell for 40% more for each Common relic sold (+0%)”. It starts at nothing: it only pays if you actually move commons, which rewards a full, varied display.
- Hole in the Pocket (Uncommon) — the tip engine described above.
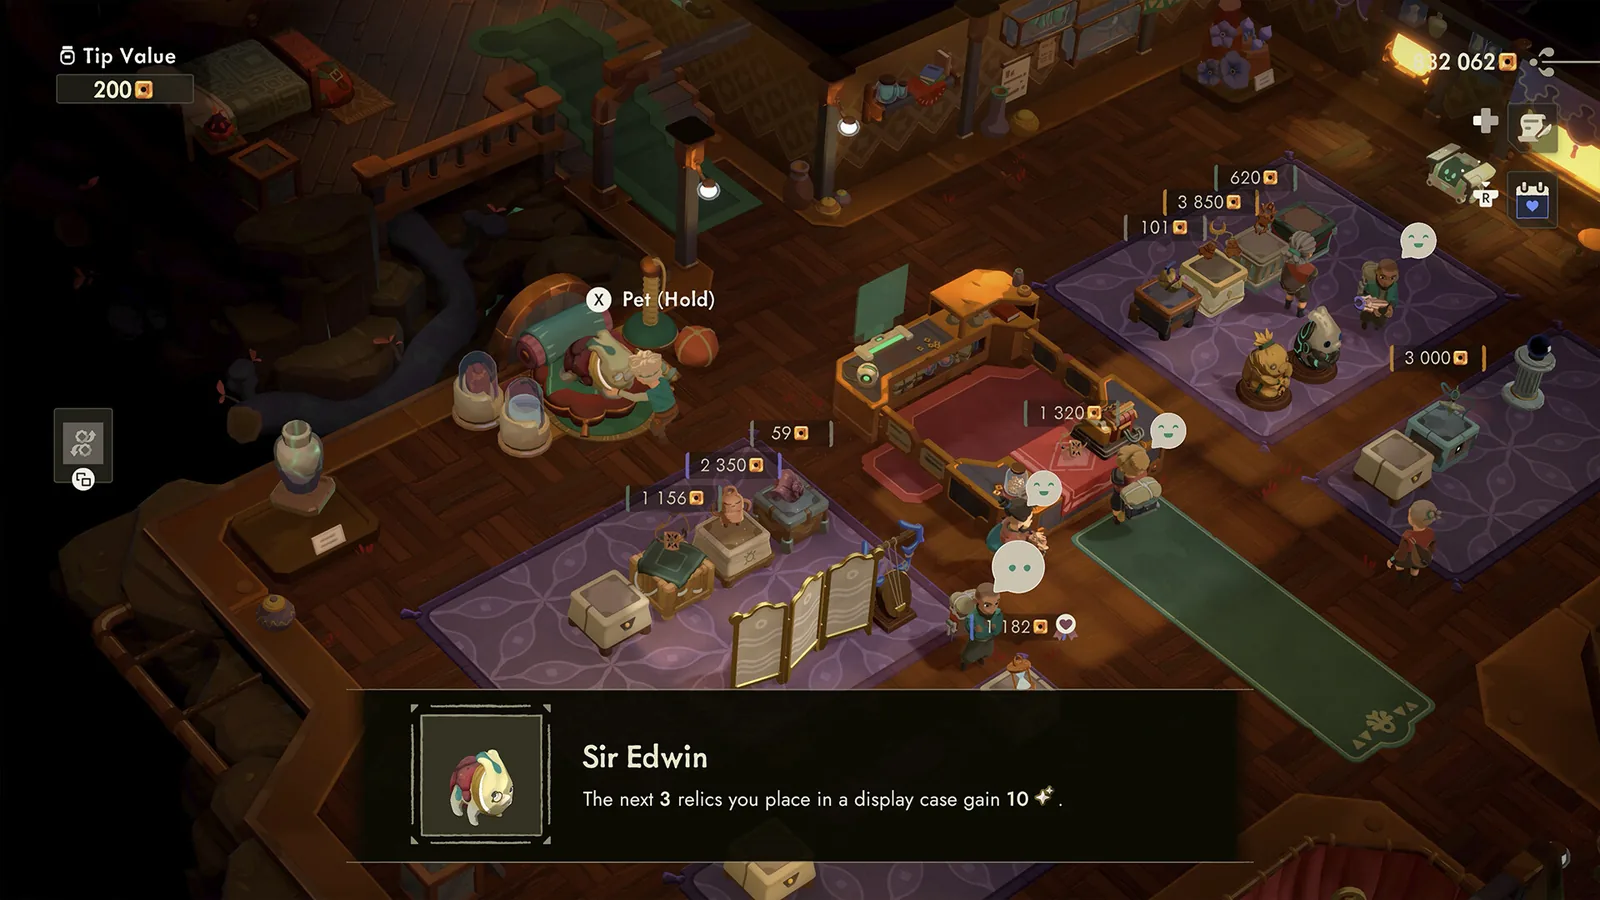
Playthroughs also show display perks that buff the next relics you place — one official card, Sir Edwin, grants the next three relics placed in a display case +10 quality — and a pet interaction that refreshes the resource. Higher shop progression adds more: footage of late shops shows a second and even a third perk meter unlocking, and the 1.0 notes add Shop Level 5 with an extra Bloblet slot and a cosmetic slot.
A selling workflow that survives patches
- Open from a baseline: a database value or yesterday’s accepted price.
- Watch the first reactions before touching anything — they tell you which way the whole display is off.
- Underprice once on purpose when the perk meter is close; Cheap and Perfect sales both push it.
- Pick perks that match the stock still on display, not the stock you already sold.
- Log surprises. If a reaction disagrees with the database, the current build wins — our price guide explains how we handle that.