
Moonlighter 2 Price Guide: Quality, Reactions & Price Bands
Set a base price, watch the reaction, adjust — and remember that quality, not the sticker alone, decides what a relic is worth.
Mechanics verified in current 1.0 gameplay Price values: community-baselineCustomer reactions ladder from Cheap to Perfect, then Expensive and Overpriced; price too high and the customer leaves. A relic’s quality stars multiply its value before the sticker is even considered. Use the database as a starting bid and let your current patch’s reactions arbitrate.
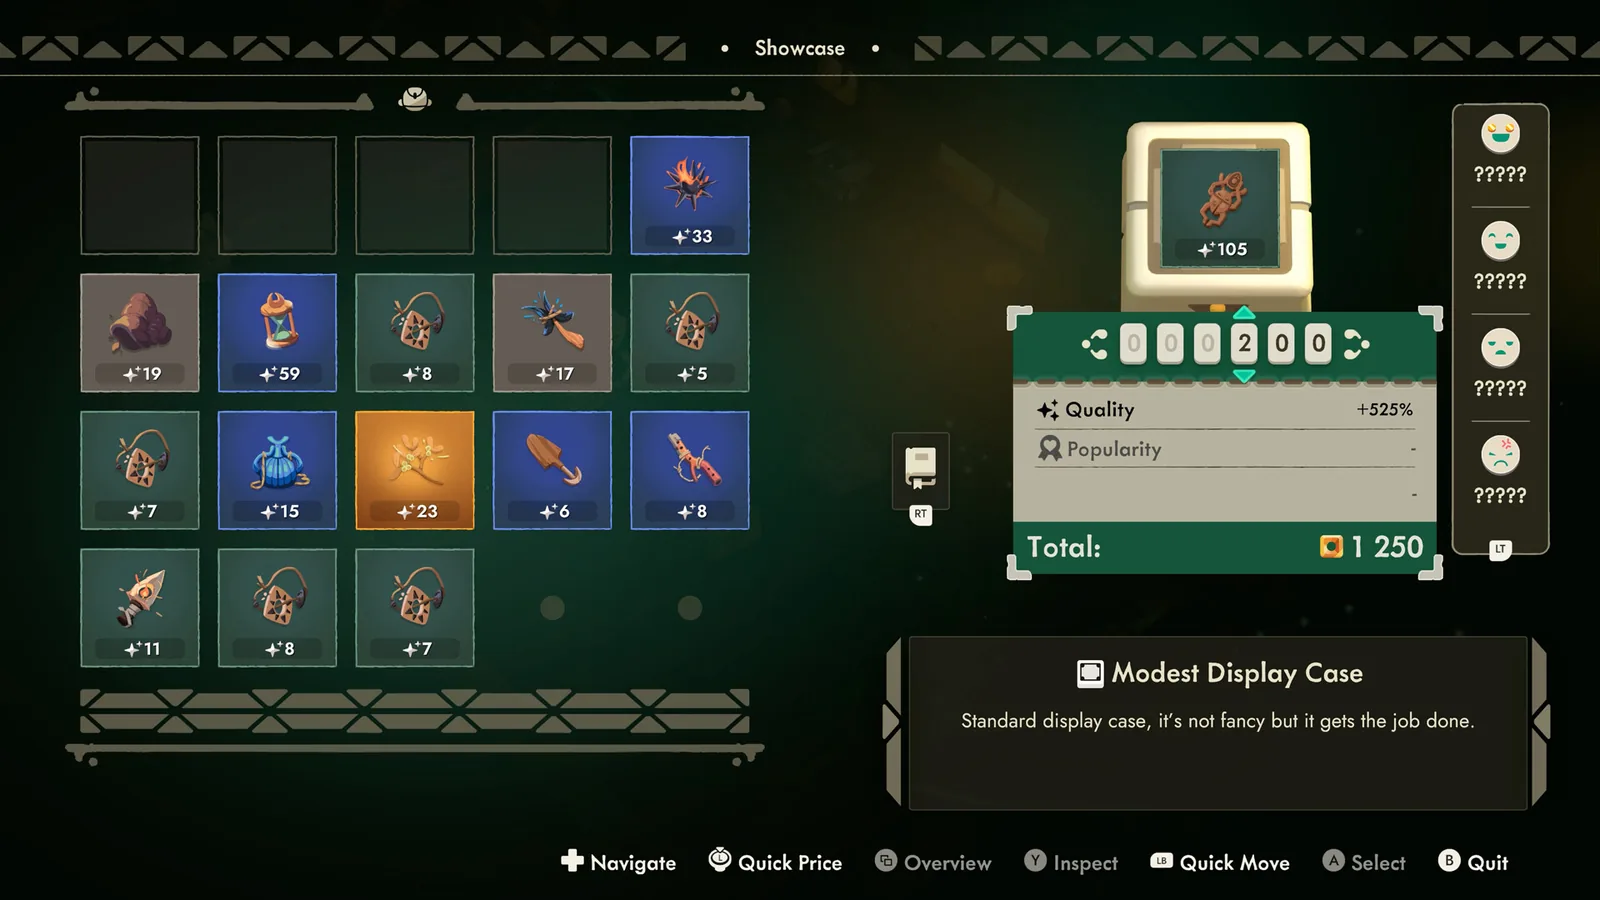
Quality is the first half of the price
The sticker you write is only the opening bid. Each relic carries a quality rating — the star icon — and the pricing screen adds it up explicitly: in the official screenshot above, a relic priced at 200 gold with a +525% quality bonus totals 1,250. Placement effects in the bag set that quality before you ever reach the counter, which is why the backpack guide and this page are really one system split in two.
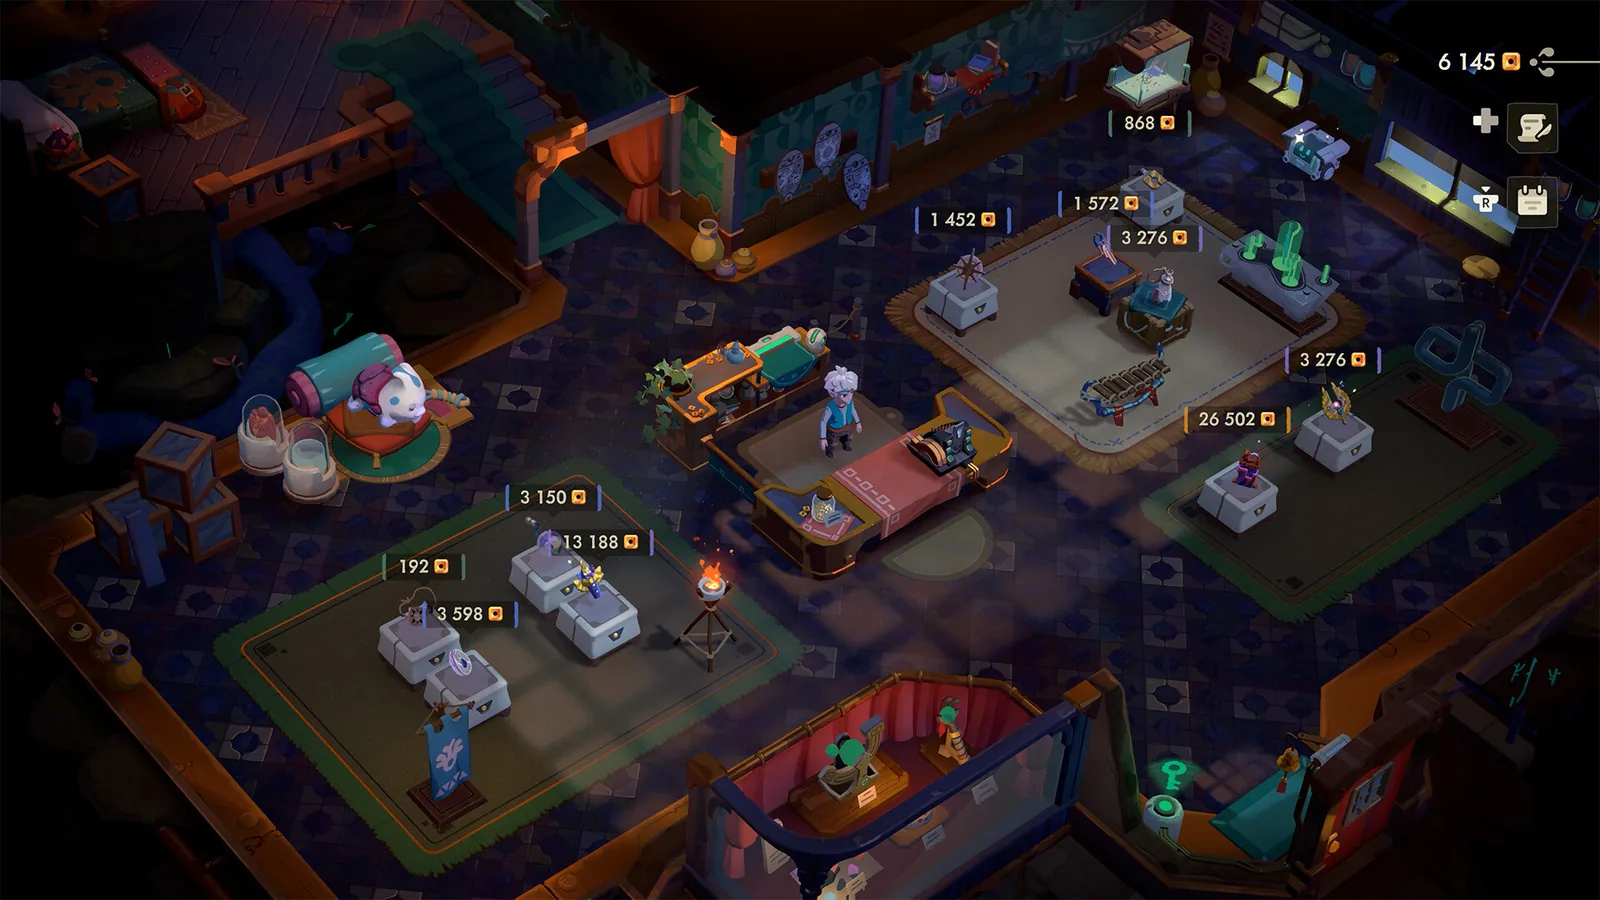
The pricing screen makes the relationship explicit: a relic with a +525% quality bonus over a 200 gold sticker totals 1,250 gold — the quality bonus, not the sticker, is doing most of the work. Official shop screenshots show how far that scales: a mature shop floor at dusk displays price tags from 191 up to 26,502 gold in a single view.
The reaction ladder is your audit tool
Reactions run Cheap → Perfect → Expensive → Overpriced. Cheap sales still bank gold (and help the perk meter), Perfect sells at full value, Expensive still converts at a premium, and Overpriced risks a walk-out. Playthroughs show players correcting a price in one iteration — “300 was too cheap, let’s go 400” — which is the whole discipline: small moves, read, repeat.
Tips complicate the math in your favor. The shop tracks a Tip Value on top of sticker sales, and perks like Hole in the Pocket scale tips directly. A customer can therefore pay you more than your sticker through goodwill — one more reason a strategic Cheap sale is not always a loss.
The community band formula
For manual planning, the community price bands follow a stable relationship: Perfect ≈ Expensive × 7/8 and Cheap ≈ Expensive × 17/24, rounded to whole gold. The price calculator applies it for you, and every record in the database ships with all three bands.
| Relic | Cheap | Perfect | Expensive |
|---|---|---|---|
| Sun Claw | 72 | 89 | 102 |
| Mother’s Patience | 212 | 262 | 300 |
| Blob Matryoshka | 2,406 | 2,971 | 3,396 |
Where big money actually comes from
Baseline bands price the relic; the run decides which relics you can afford to sell at all. Dedicated money runs in 1.0 footage chain blue and purple chests rather than common loot, because the items worth selling “are not in the common and uncommon section”, and display tags in official screenshots reach 26,502 gold in a single view. Stack a Gold Boost perk (+30% to all sales) on a heavy-stock day and the bands stop feeling like a ceiling.
Sources & version note
Mechanics (quality bonus, reactions, tips, perk effects) are checked against official store screenshots and current 1.0 gameplay transcripts. Price values are maintained as a community baseline from the Steam Community price guide era and rechecked when a patch or current-game reaction disagrees.